Welcome to Dinopix JIRA Help Centre! Here’s a step-by-step guide on how to navigate our system and log your tickets efficiently:
Step 1: Order Confirmation
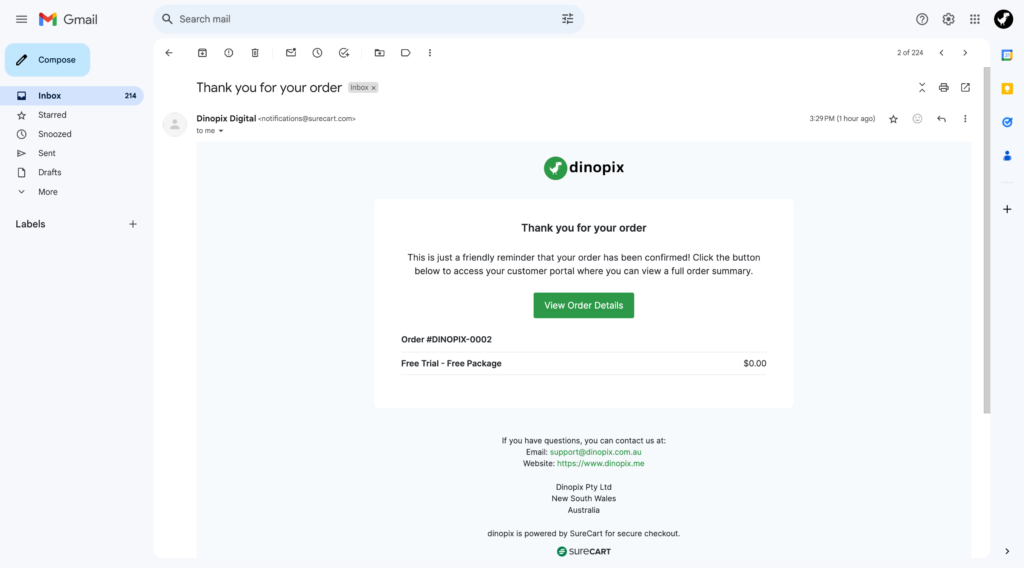
After signing up, you will receive an order confirmation via email. This confirms your package purchase or free account setup with Dinopix.
Step 2: Account Sign-In
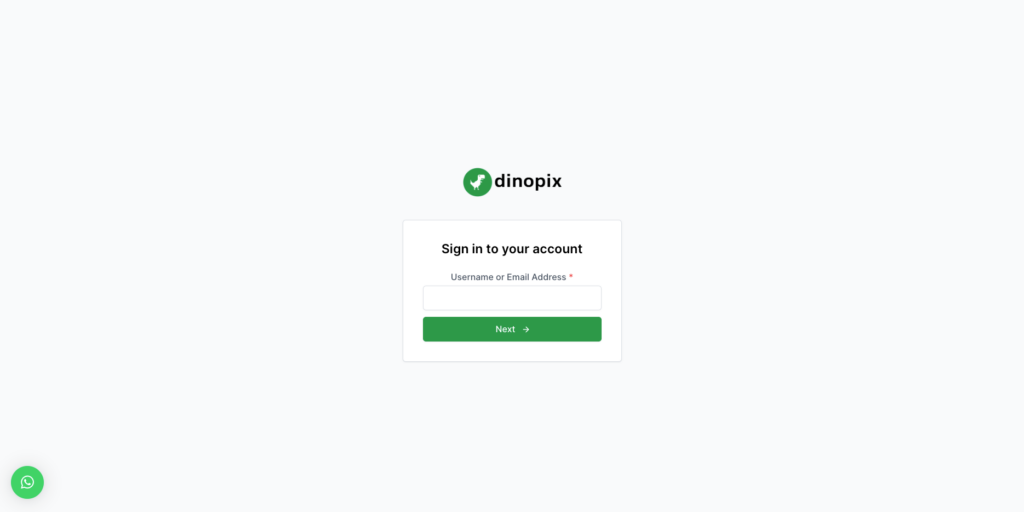
- Go to the Dinopix sign-in page.
- Enter the email address you used during the sign-up process and click “Next”.
Step 3: First-Time Login
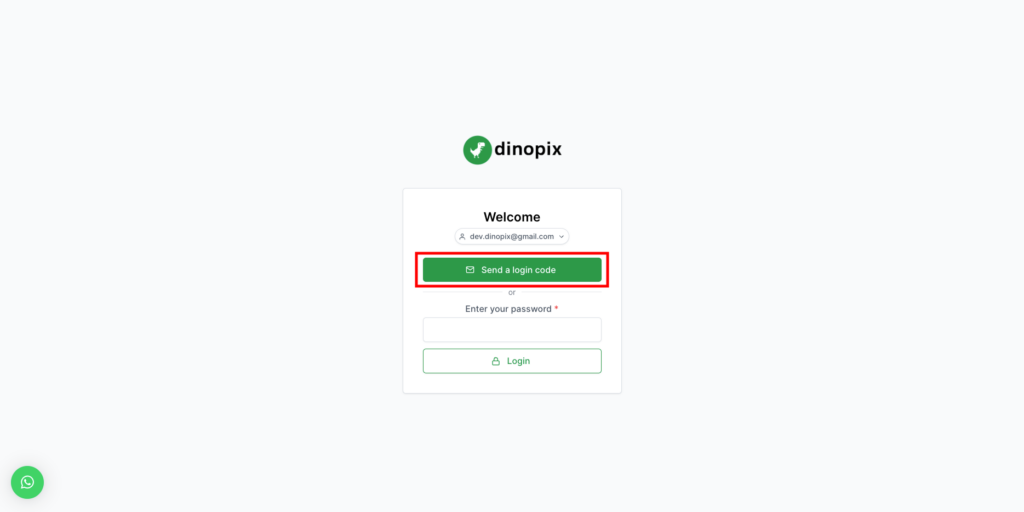
- If this is your first time logging in, click on “Send a login code”.
- Check your email for the login code.
Step 4: Dashboard Login
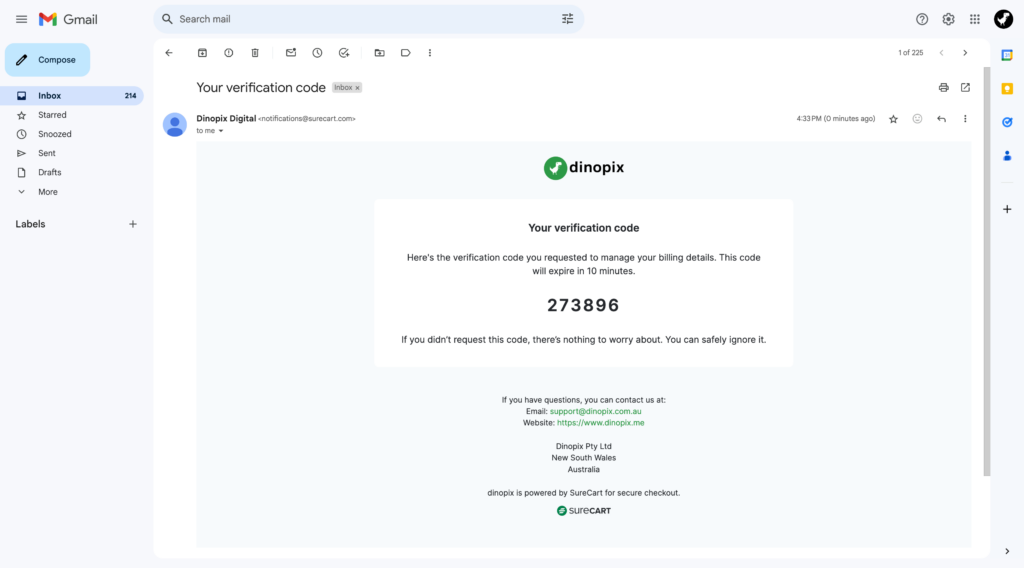
Use the login code sent to your email to access the dashboard area within Dinopix.
Step 5: Accessing JIRA Board
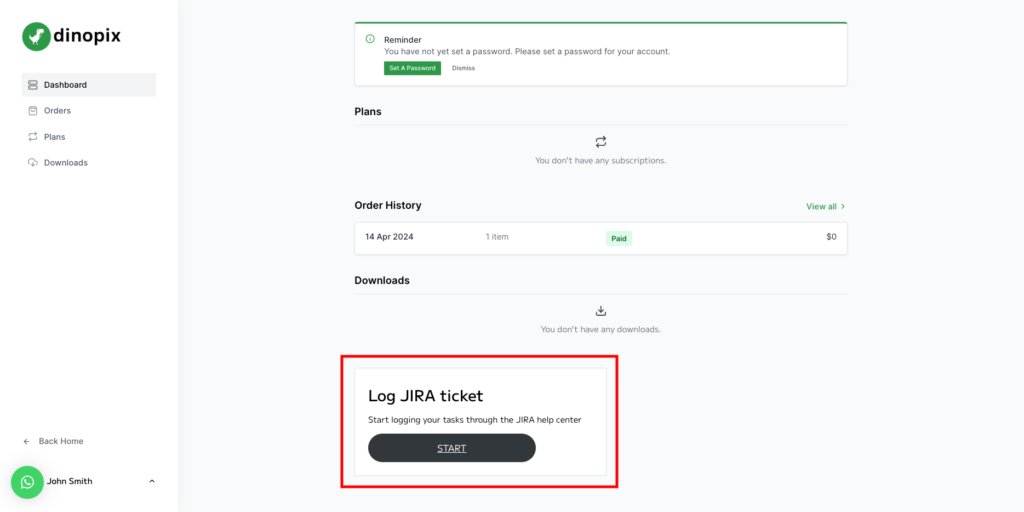
- Once in the dashboard, locate the section titled “JIRA Help Centre” or a similar heading.
- Click on “START” to proceed to the JIRA Board.
Step 6: Logging a Ticket
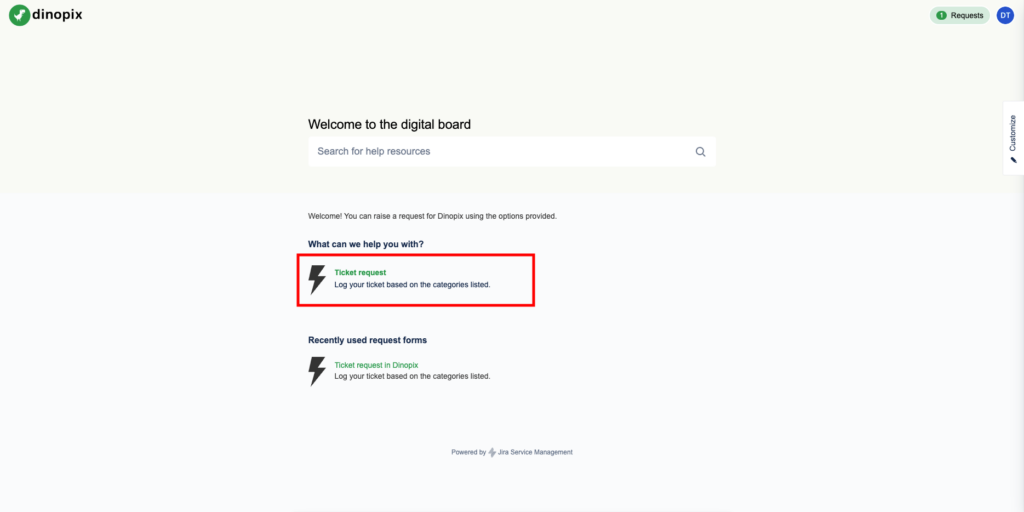
- Upon redirection to the Dinopix JIRA Board, select “Ticket Request” to begin logging your issue.
- Make sure to enter the email address you signed up with to ensure seamless communication and ticket tracking.
Step 7: Email Address for JIRA
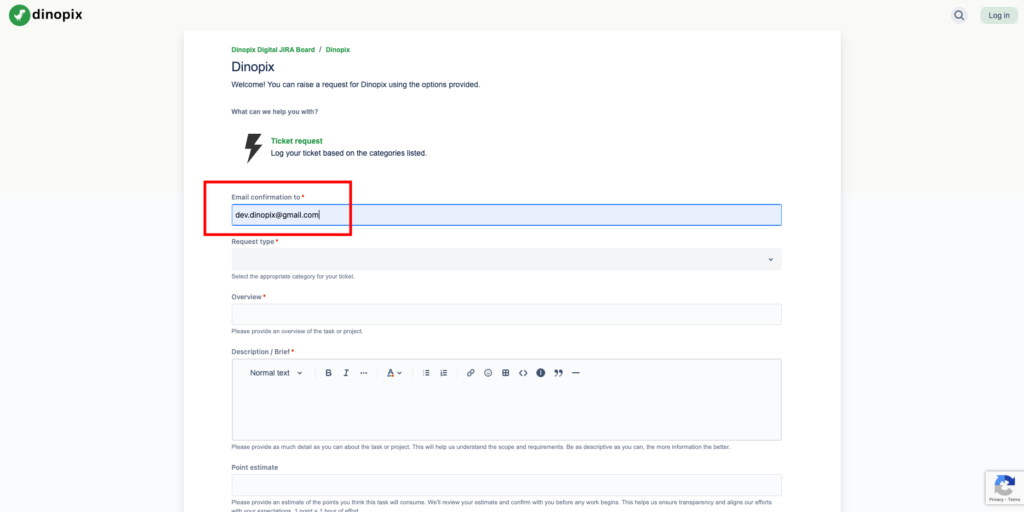
- The email address entered will be used to set up a new JIRA account if you do not have one.
- It’s crucial to use the same email address consistently.
Step 8: Estimate Effort
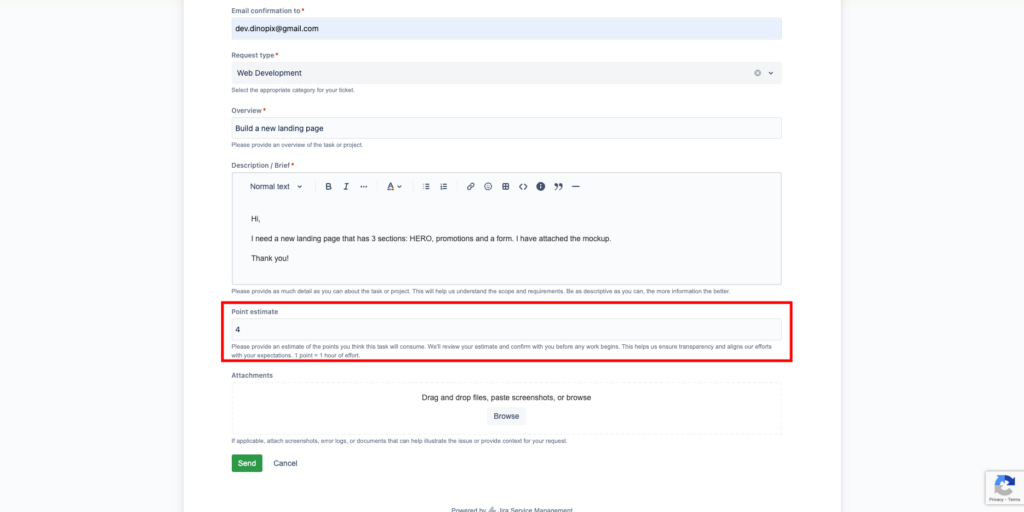
In the provided field, estimate the number of points you think the task will consume. A point corresponds to an hour of work.
Step 9: Ticket Submission
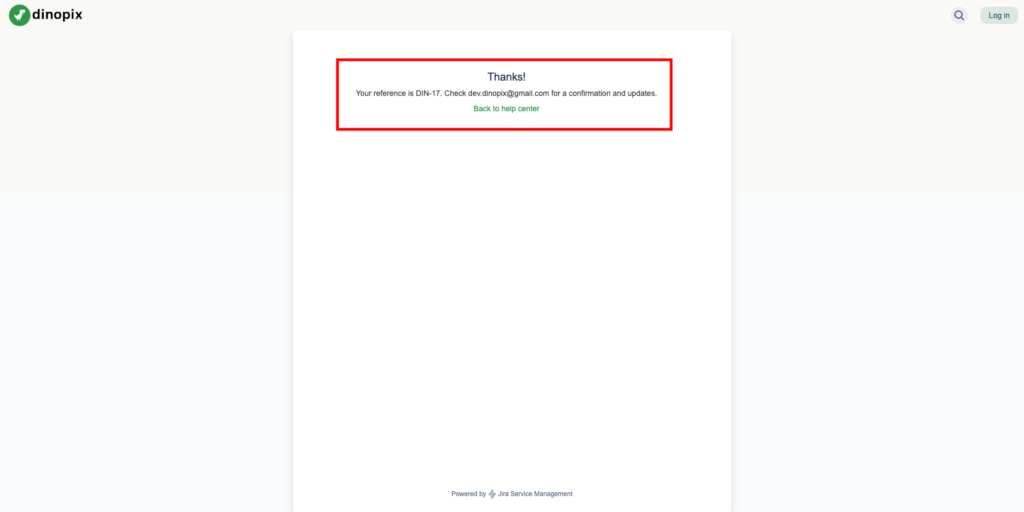
- Upon completing the form, submit your request.
- You will receive a reference number for the ticket.
Step 10: Email Confirmation
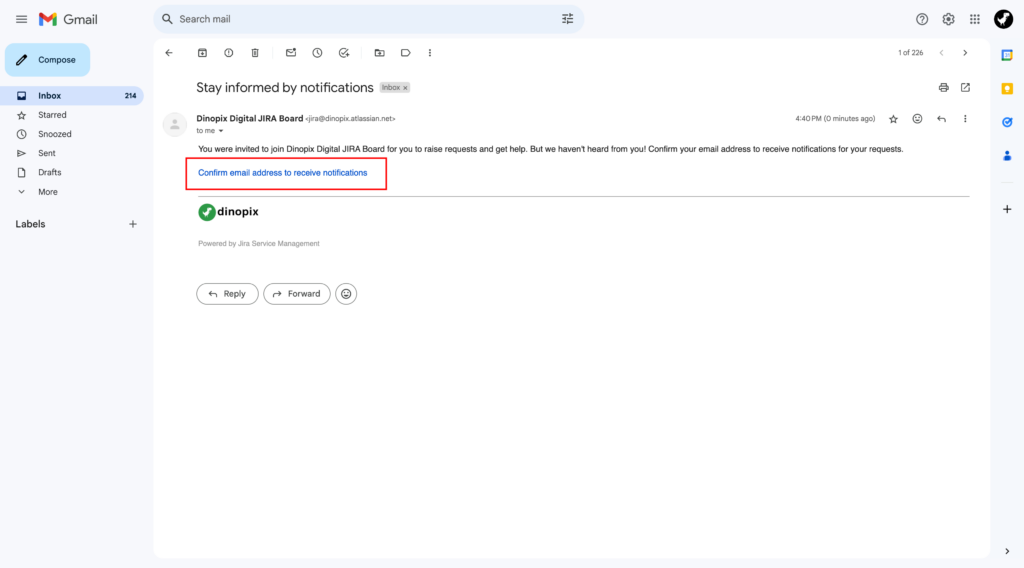
After your first ticket submission, an email asking you to confirm your email address will be sent. This is essential to create your JIRA account for tracking tickets.
Step 11: Account Creation
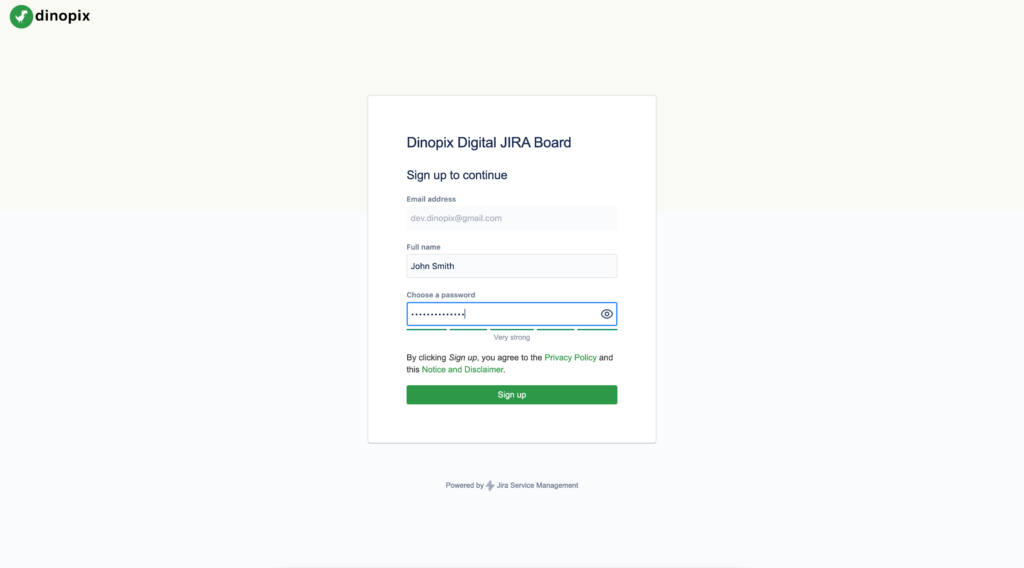
Click the confirmation link in the email to be directed to the JIRA account creation screen.
Step 12: JIRA Dashboard Access
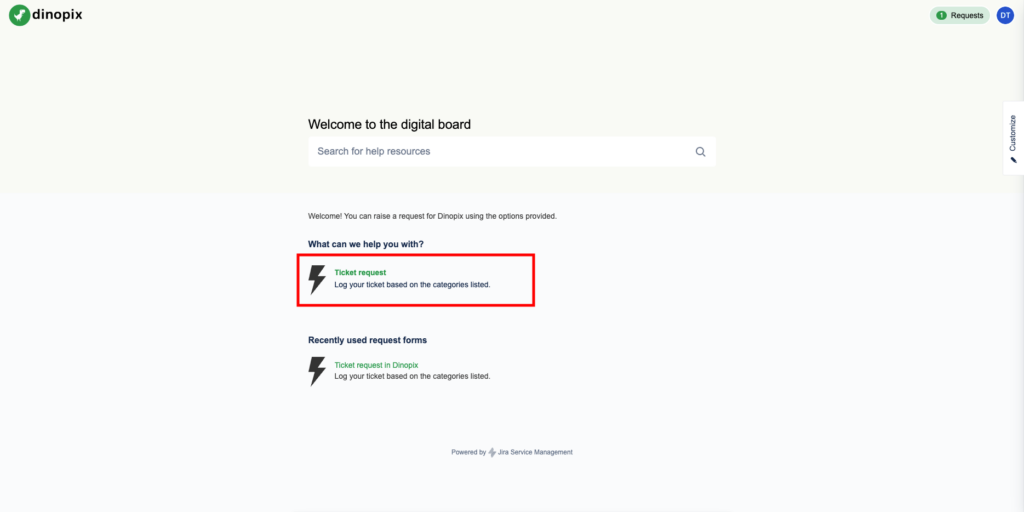
- After account setup, you will be redirected to a dashboard where all your requests are visible.
- Bookmark the provided link for easy future access to the JIRA board.
Step 13: Tracking Tickets
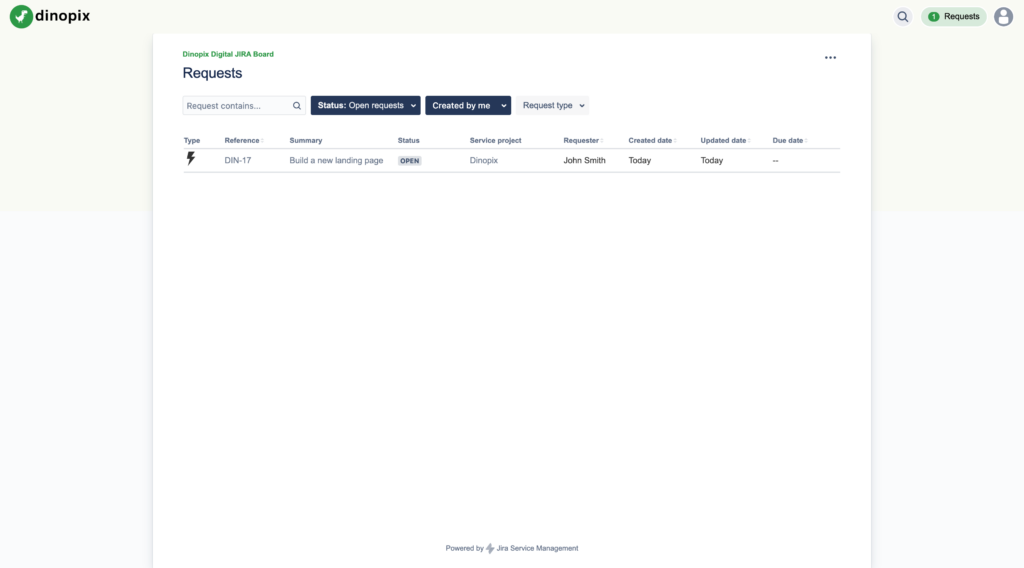
The JIRA board will display all the tickets you have logged, allowing you to monitor progress and updates.
Step 14: Collaboration and Updates
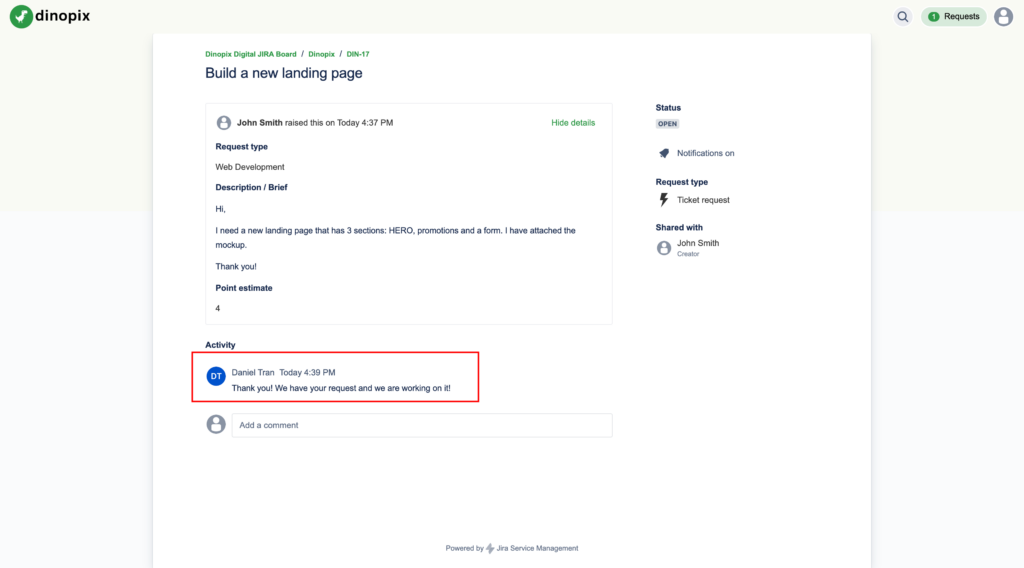
- Click on individual tickets to view detailed statuses and comments.
- This will be the main hub for collaboration with the Dinopix team.
Step 15: Email Notifications
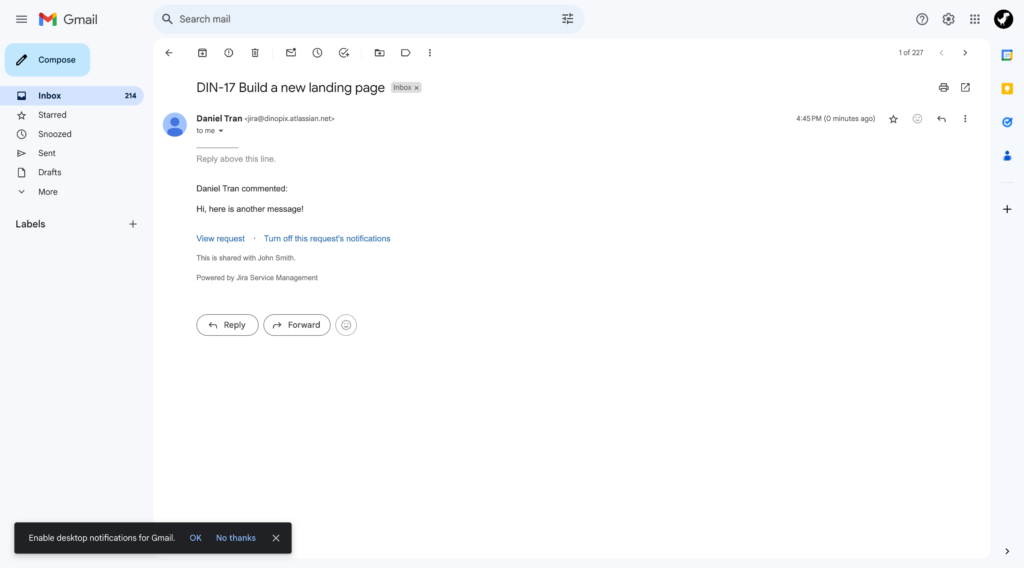
- Any updates or comments made on the tickets will trigger an email notification.
- Keep an eye on your inbox for these alerts to stay informed of progress.
Following these steps will help you navigate the Dinopix JIRA system with ease. If you encounter any issues or have questions, contact [email protected] for assistance.


